Friday, December 20, 2013

Sherline Mill - X Axis Oiler

Just like all Sherline mill owners I have had a hard time oiling the X axis but when I saw the X axis oiler option for new machines from Sherline it got me thinking about how I could do a retrofit on my two mills.

I am always looking for "no cost" upgrades like my Y axis Extension so this is what I came up with.


Using (for the 1st time) my 1/8" tube bender I created a perfect little work around.


I made the aluminum one as a test but didn't have enough soft tubing to make the finish versions. So I switched to copper tube, the copper had to be annealed 1st.
The room above the spindle is very slim so I crushed the tube about half way. I made the little hold downs and the flaring tool too.


Ultimately the fill end of the tube has to be above the exit end as a result the tube remains full of oil in between oilings, I drop a small steel nail into the top to keep dirt & chips out and use a magnet to pull it out.

It's easily removable if it gets in the way but it is below the top of the ways so I don't think there will be any issues.

I think it makes a perfect no cost upgrade, I'll report on any issues as they come up later. 

Saturday, December 7, 2013

Sherline Lathe - Back lash adjusters

Wishing to add backlash adjustment to my manual lathe I noticed Sherline's new offering of what is essentially the CNC Z axis lock modified to fit the lathe. I understand that backlash in normal lathe work is almost a non-issue but having the gibs tight but not too tight is the goal. Also for cut-off work you would hate to have a wondering X.

I thought that I would buy the 3/8 - 20 LH tap instead of buying the parts and found one only at The Little Machine Shop.

Not caring for the simplistic design from Sherline I thought I would try something of my own.

P/N 4417Z CNC: Lathe Lead-screw Backlash Adjuster Upgrade, $35.00

Each time I make an addition to the Sherline machines I take great pains to digitize whatever part of the machine needs to be designed to or around and this was no exception.


I came up with this, the motion for tightening the lock lever is CC in this view.


I got a good millings out of 1/8" 6061 - T6 for the adjuster arm and 1/2" thick brass for the lever.


Had to make a little fixture for the lever so I could hold it during milling. 


For the adjuster I leave .010" at the bottom and have to cut and trim afterwards.


I also added the standard star-wheel for the Y axis too.

To get the lever in the adjustment range required for this to work I had to slowly mill the saddle nut down until the lever ended up in the lower right quadrant. This is where machine repair patience is learned; mill, assemble, disassemble, mill, assemble, disassemble, mill, assemble, disassemble, mill, assemble. 

After all that I got the Y axis down to a good feeling .003" backlash but I could only get the X axis down to .008" before it felt too tight? Maybe after some wearing-in I can settle into a better number.
NEXT DAY: I rediscovered the Sherline detail regarding the hand wheel position; the hand wheel can and should be tight up against the mounting, in the case of my X axis it had become very loose about 0.008" loose. After tightening it I discovered that I have essentially 0 backlash with my new system.

I know; it was about 8 hrs work when I could have just bought the thing for $35 but... now I have the LH tap, and more experience on the mill, plus more confidence in tear down.

Saturday, November 9, 2013

Sherline CNC Mill - Vacuum Clamp

My friend Jay from MotorCity WatchWorks asked if I could machine some custom watch discs for him and always wanting a challenge for programing and machining I said I would.

The 1st part of the project was to figure a way to hold the feather weight 1.125" dia. x 0.025" thick watch discs without damage and in a way that would allow for quick operation. I decided to try and make a vacuum clamp and so came up with this little number.


This block of aluminum has the grooves for clamps, a threaded hole, pins to align the disc, and an O ring for sealing. The alignment to the center hole is off a little so I'm going to have to do a test piece and adjust X, Y, for the final set up, after that I just throw the next one in, turn open the vacuum valve and start the program. The natural pattern from the shell becomes the artistic part of the process; I look at the pattern in different rotations and decide how I would like the waves and curves to look for the finished piece.


The discs are machined out of Mother of Pearl shells and the pattern that I machine is designed by Jay. I cut the pattern about 0.007" deep and Jay adds watch lum into the pockets. The whole milling takes 2min - 28sec. using a 1/16" end mill.


The Z height had to be tuned to minimize the depth too, now that I think about it I set up off of the fixture top and not the top of the O ring!


This is just one more use for for my JoeWoodworker vacuum system.


Sunday, August 4, 2013

Parker Bench Vise Mod. No. 2200

Something drew me to buy this bench vise at a local estate sale; I think it was a combination of the unusual rotating mechanism, the nice form, and the great price?


It was caked with at least three layers of paint over the dirt & grease so I took it to George's Collision for sand blasting. I decided to try a finishing idea I had and this seamed too be the perfect project. Vices by there very nature typically have painted and unpainted portions on the same part. After completely dissembling it I did a full taping of the parts to be primed & painted and gave them 3 coats of color

For the unfinished parts I used Perma Blue Paste Gun Blue, I really like the paste gun blue over the liquid stuff; I apply it with a tooth brush smearing it over one whole area quickly and then working it in until even. The problem with liquid blue is that it goes on unevenly and so is difficult to balance out.


Now why did I go thru all this trouble for a vintage vise? Well when I checked out the C. Parker Co. from Connecticut I discovered that Parker made some highly respected guns. This connection makes these Parker vises collectable. Just by using it and taking it apart it becomes clear that it is a cut above the typical. The jaws are steel and fit tightly to the machined surfaces of the castings. Unlike most vises this one has very little free play around the moving jaw slide and interesting too is that it has a large spring around the screw to assist opening and eliminate the backlash.


Note the little keeper casting on the front with "Parker" cast into it.


And lastly the rotating system that caught my eye from the start; its a nice, easy, fast, & secure way of rotating the vise on the vertical axis, however... the down side of this system is that you have to have open access to the underside of the bench, not always possible.

Charles Parker / Parker / Chas. Parker: Parkers are this author's (mjozefow) favorite vise. They are famous for the shape of the jaws on their machinist vises. The jaw shape allows for more complete access to the workpiece being clamped. Some history on the company and Charles Parker himself:

"The Meriden Enterprise Center is a large manufacturing plant that is home to over 60 businesses, located in the center of Connecticut.

The plant was the former home of companies such as the Charles Parker company, known for the manufacture of the Springfield rifle and the development of one of the early repeating rifles in the mid- nineteenth century. Charles Parker was born in 1809 and rose from poverty to become one of Connecticut’s leading industrialists. He also became the city of Meriden's first mayor. He started his manufacturing career inventing and producing coffee mills in a small shop in 1832.

By 1860, he owned several large factories and employed hundreds of people, in and around Meriden. Parker products included hardware and house wares, flatware, clocks, lamps, piano stools and benches, vises, coffee mills, industrial machinery, and, after 1862, guns. Guns, however, never amounted to more than 10 percent of Parker’s business. Charles Parker died in 1901 and his descendants carried on his businesses until 1957. The Great Depression of the 1930s took its toll on the Parker enterprise and it never fully recovered. Parker products have now become “collector’s items,” especially the Parker shotguns. The Charles Parker Company sold its gun facility and the rights to the Parker gun to Remington Arms Company in 1934, and Remington continued the Parker shotgun line until World War II.
The attraction by collectors to the Parker shotgun comes because of the gun’s inherent quality and beauty.
The Parker gun is an American classic".  


Base & washer (under bench)

Monday, July 29, 2013

Sherline CNC - Mach3 - ShuttleXpress HMI add on

This a completely un-sponsored un-solicited opinion.

Possibly the most significant addition to my CNC work station is the ShuttleXpress. Marketed under several different names and widely varying prices this little guy is awesome.


Set up is quick and easy I won't go thru that.

I like to place it anywhere on my desk that is most comfortable that day or time. I set the X, Y, & Z across the top three buttons. The rubbery wheel is set with the negative spindle direction (counter-clockwise) and positive direction (clockwise.) I no longer use the inner most dial with the finger dent in it, maybe I'll revisit it sometime to see if I like it better.


I can't express how much easier and more friendly using my CNC mill has become now that I am an "expert" at using the ShuttleXpress for set up. when its time to set 0,0,0 you click whatever axis you need to start with (and get a little audio note from the computer,) then drive slow, then fast, then slow to your position. With Mach3 I hit the "Off Line" button on the screen, drive the numbers with the ShuttleXpress to the desired actual position, hit "Off Line" again and you are ready to start the NC program.

All of this can be done with the "Tab" initiated window on Mach3 but running that window from your mouse is terribly cumbersome, I don't even open that window anymore.


Thursday, July 18, 2013

Sherline Lathe - Allignment

Alignment is critical so I wanted a way to mechanically align the head and the tail stock. 

 I purchased a 1/4" tail stock extension from LatheCity and fit a .251 gage pin in the end. With both the tail stock and the spindle head slightly loose and the gage pin secured into a .250 collet I then slowly tightened each until secure.


The test to see if all was good was to move the extension all the way off of the gage pin and back onto it noticing for any hang up when encountering the gage pin again.

So for the indicator readings prove-out I put the old Last-Word on it.


 With the .251 pin in the collet I got a reading at the spindle end of 3 tenths TIR. And driving the full length of the pin I found no readable deviation; as my friend Tom Vickers always says: "good enough for who its for."


Friday, June 14, 2013

Landis Strap Cutter - Restoration / Sharpening

Bought the strap cutter and with shipping the price was fair but it really needed a new blade.


The blade had a chip knocked out of it, too deep to sharpen out, and too deep to live with. After pricing out the new blade at over $100 I decided I should at least try to fix it, since I would have nothing to loose.


I decided that the TIG welder was going to be the answer... TIG is amazing, much more like gas welding than MIG.
So I added some metal to the edge of the blade.


And ground it off very slowly keeping it cool.


Made the Herculean effort to get the blade off of the shaft so I could sharpen it using my DIY Dremel grinder attachment sharpening system.

Removing these blades must be done carefully, the Left Hand thread is always confusing, they are hard to hold, and easily damaged.

After sharpening I quickly tried it out and with softer leather the cut was not all the way through. I decided that it was because the gap between the drive teeth and the outer ring was too great, about 0.080" So I shimmed the drive teeth out about 0.015" and cut 0.025" from the inside of the ring making the gap less than half the width it was. The leather can't be pushed down into the gap like it used to.

And here she is all finished.


I repainted all of the black parts and the logo too, then not wishing to match the green and I like the mild "worn" look I simply sprayed the entire piece with clear lacquer, after a thorough washing with Super-Clean.

Wednesday, June 12, 2013

Delta BOSS Modification

I got the BOSS back when it 1st came out and I think it is a extremely well engineered machine. Plus unlike most other Delta machines it is QUIET; I love Quiet, all of the typical Delta machines like my 1" belt sander make as much noise as a garbage truck, I hate it, and won't consider Delta unless I hear it run 1st.


As I moved away from woodworking and into shoe making I used the BOSS very little but found that I needed a spindle sander for critical finish work on the leather soles and heels.


The problem is the oscillation; the spindle must be stationary. So I decided to figure out how to disable the oscillation motion.


After successfully removing the two links and locking the the motor in the up-most position I realized that I had a great opportunity to make an adjustable height system.


I am so far very happy with the results.

Monday, June 10, 2013

Shop charts - Drill size reverse look up chart

I just like this way better; instead of the standard drill size charts I spent all the time to make this far better method for finding drill sizes.

I have always disliked going through the process of "finding the closest" when using standard drill charts, this mostly occurs when I am doing restoration work.

There are two ways you look up drill sizes:
  1. Start with existing sizes and get the decimal equivalent.
  2. Measure something and find what is closest.

This chart allows you to find the exact number that you have on the micrometer in your hand and decide how to proceed with the standard sizes available.

The reason I like this method is because when you are standing there with the micrometer in your hand and you have decided on the number that you like, that number is not on the standard charts, only something close to it. With this chart you focus on the exact number on the micrometer, then start looking for standard sizes. It's an easier "reverse look-up" than doing the math in your head.

I added the common fastener sizes and again I think it is easier to see the whole range at a glance than any other way.


When you look at it the gaping holes jump out, it seems like almost any other system of standard sizing would have been better but this is what we have to work with.
Hope you find this useful.

07.30.13
After using my chart on several projects I am completly sold on it; it is so much better to have each number than it is to start with doing the math in your head every time you want to assess a dimension.


01.30.14
Added some overlap tap groupings.


Sunday, June 2, 2013

2 Sided tape Splitter for leather work

For leather work two sided tape can be a huge time saver. This model from 3M (#S-17454) is the best however... the minimum width is a 1/2". The tape film itself is only 0.002" thick; very nice.


So I made this 1/4" splitter. The Exacto blade is 0.020" thick so it is mounted .240" above the table. It must have the screw near the end to keep the blade from rising as you cut.


I used a 1/2" x 1.3" x 3.2" piece of black nylon to make this splitter. I made this little gem for my new friend Lisa Sorrell.

Tuesday, April 23, 2013

Vintage Drill Bit Holders

I became fixated on this particular style of vintage drill bit holder and spent several months searching on EBay to finally acquire these two beauties.


 These Cleavland drill bit holders are very cool and when you are in the shop they are always a pleasure to turn to.

As soon as I got the fractional size I realized that there were also numbered drill bit holders out there too.


I will need to do a restoration paint job on the fractional holder in the future.


05.20.13
OK a little Drill bit holder obsession going on here but its fun, they are cool, and I use them.

Next I came across this little gem on EBay and had to have it!
I could see thru the original condition that it was unique and had potential.


Quite a mess so after water blasting I decided to etch the surface so that my paint job would not end up like the original. It seems like a zinc casting so it is nice and heavy but the original surface was so smooth that blue paint had nothing to bite into. I went with a tough gloss black enamel and the next day scraped off each of the fractions, very readable.
Without drills in it the holes appeared to be all parallel but to my surprise they are fanned out to make it easier to handle the drills. The designer went for 4 rows of 8 drills that left 3 extra... so there are four 1/16 bits; brilliant!


I have been designing my own Letter drill set holder but have not settled on a design yet. When I do I will mill it out of heavy tooling foam or aluminum. submit your ideas!

25

07.22.13

I picked up one of these diamond shaped Cleveland Drill holders for another numbered drill set and was so impressed with the usefulness of the design that I quickly went for the fractional size too.


A very nice design; the 64ths run up one side and all the other sizes on the right side, its easy to read and heavy enough to stay on the table. The numbered set goes from 1 to 60 with the odd numbers on the left and even numbers on the right.

Next came this totally unique folding case, normally I dislike folding cases because they are hard to use, hard to read, and hard to keep open. Now this General case solves all of the above issues and does it with beautiful design.


Although not small it is for good reason, it is wide and thin compared to the standard three row case.

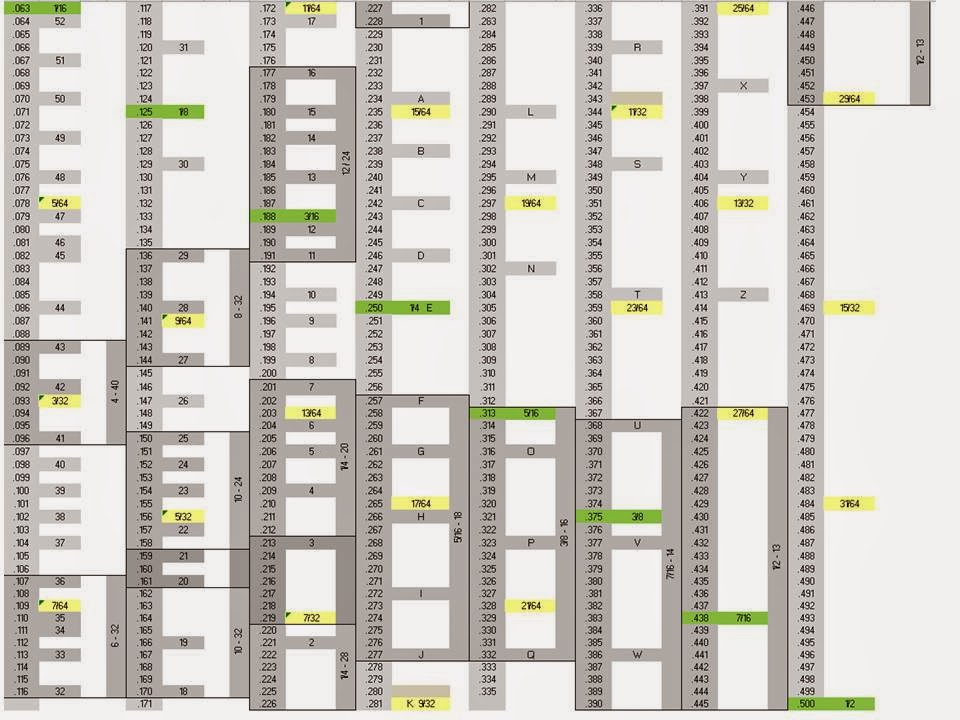
When open we have only two rows with this clever folding size plate that has both the fractions and the decimals listed together, big enough and contrasting enough to read easily. In addition it has a Tap drill size chart on the inside of the cover.

It stays open via this cool little red kickstand on the right. All in all a great little design albeit big and heavy its a nice example of let's do it right!

09.21.13
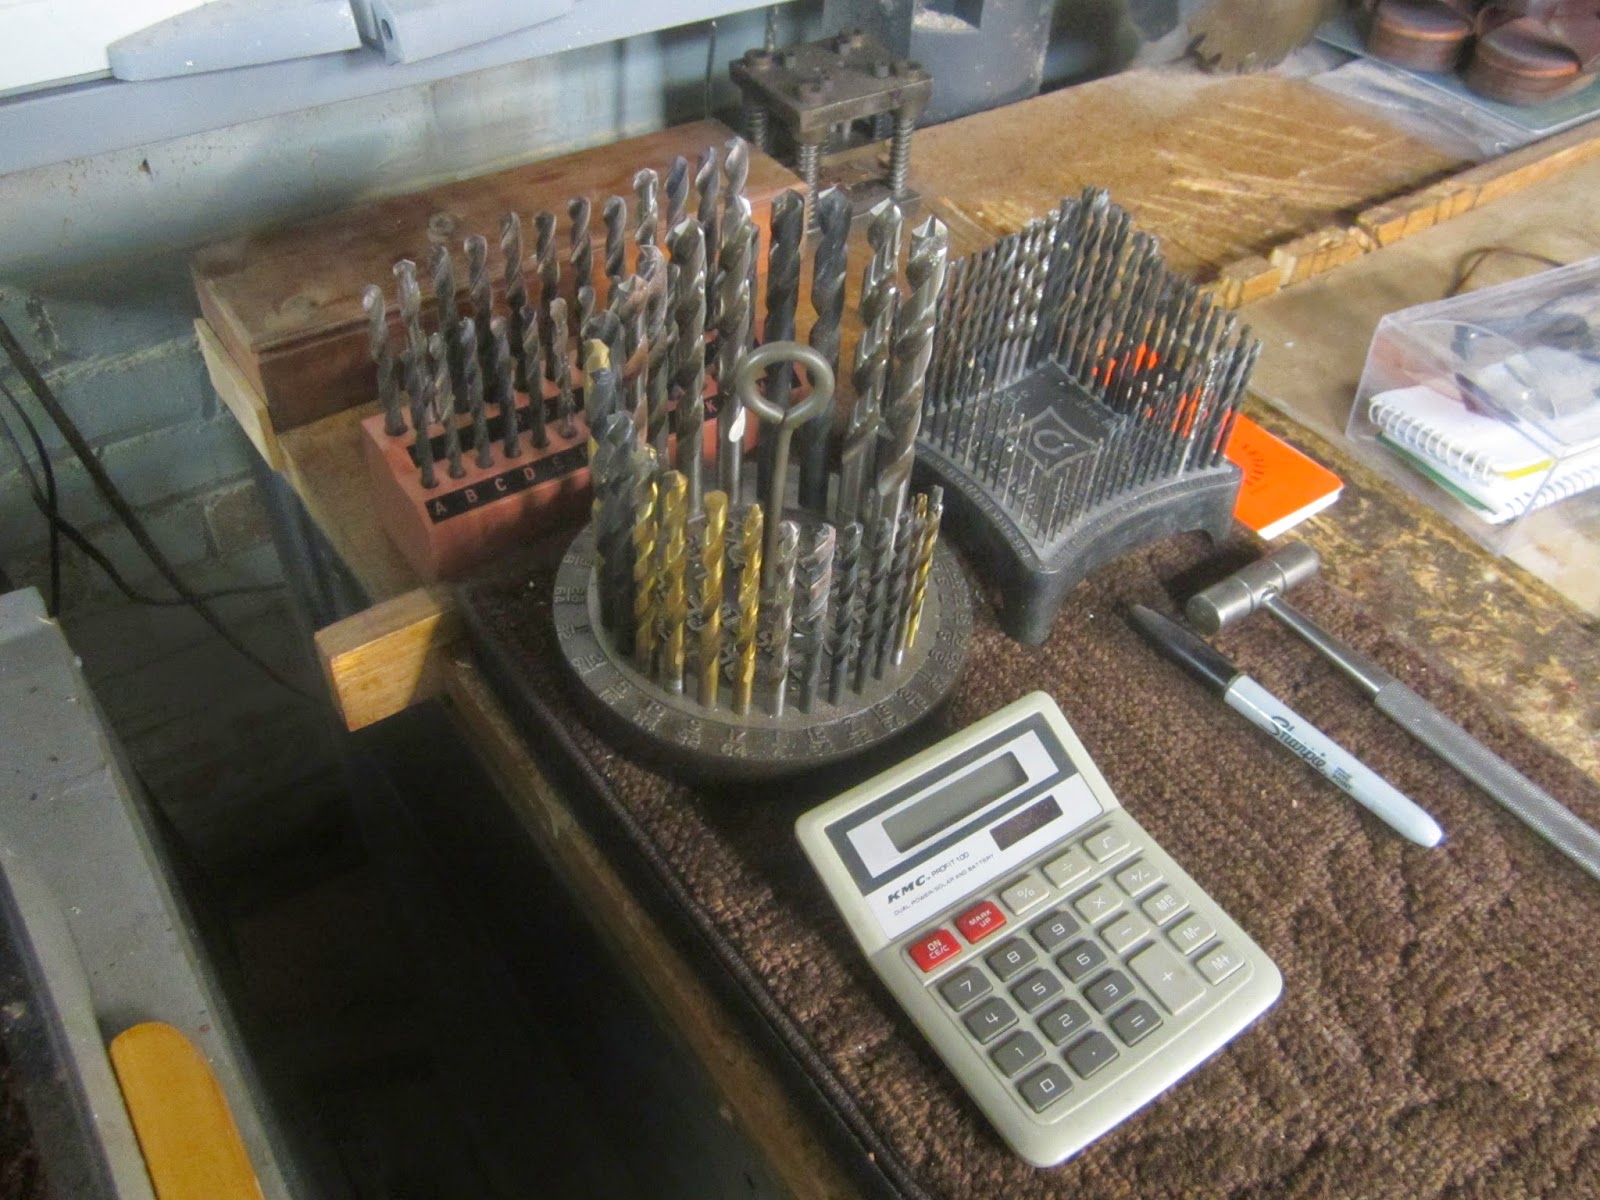
Now this is the BEST; big, heavy, and easy to read the New Process bit holder is beautiful and functional. Plus it's got the pick-up ring in the center for easy moving about.


I refinished it with a paste gun blue after media blasting, then sanded the highlights with 220 on the random orbital and lastly sprayed it with a clear lacquer.
I didn't notice until I went to take the picture that the NP and the Cleavland fit together perfectly about an inch apart!

04.26.14
Well apparently I am the only person that ever wanted a Letter drill holder and since I have never come across one I decided to make my own. 
I tried many different designs but had to settle on a very simple shape because I was using my Casio label maker for the letters.

I machined the basic form out of 30 lb. foam. I added a small radius at the top of each opening and machined down into each hole about 0.150" this allowed me to drill each of the holes using the milled guide. 

And so I have all three drill sets within arms reach of Grandpa's King-Sealy drill press.