Wednesday, April 22, 2015

Tribute to my Cat Boo Boo, my shop Buddy

Boo Boo started out life in 2003 as Bruno, and he was a tough guy from day one. From the 1st day he got into the house all the other cats new he was in charge.
He was a rescue like all of our cats.


Fearless; no cat, no dog would he back down from.


He got to the top of the 7' tall amour with two bounds.

Very independent as an outdoor cat he roamed far and wide.

Some time in September of 2007 at the age 4 he went out and didn't come back, we got a call after posting pictures around the area. He was sitting in a driveway in a soaking rain. We picked him up only to discover that he could not control his back legs, must have had an accident; maybe broke his back?

I took him to several vets and and finally got a shot of synthetic hormones that mostly cured him. Although he walked fine he could no longer jump; he had lost all the strength in his back.

From then on he was an indoor cat only venturing outside when prompted. This is him sleeping soundly in my shop.

The last couple years he had become diabetic; we zeroed in his dosage as 9 units in the morning and 7 units in the evening.
A couple of months ago he had a urinary tract infection and after we got that under control he was never quite right.
So he had become totally dependent on me and I on him. I never ran a machine without making sure he would not be frightened, I stopped every hour or two to brush him, and he always said something when I walked by.
I think the thing I miss the most is that when I started taking piano lessons I practiced in my shop. As soon as I sat down every day he would walk over, lie down, and stay the entire hour. About midway thru however he would stand up and head butt my leg letting me know it was time for a head scritch.


I miss him so...

He was in such bad shape that on Sunday I took him in to the vet, brushed him so he looked his best and held his head as he passed along.

I know full well how meaningless this all is but it hurts.
I apologize to Boo Boo, and to you.

Saturday, April 11, 2015

Metric Over - Under Drill set for Fractional sizes

As we all know the nonsensical Number and Letter drill system is woefully inadequate for the proper Over - Under drilling. It doesn't matter how, why, who, or where this systems came from it needs to be replaced.

Previously I posted my "Reverse Look Up Chart" and have now added some changes to what has become the only chart I go to when sizing for any of the custom work I do. Again, what I like about this chart is the ease and speed with which one can make a decision for hole sizing. After measuring any shaft, pin, or dowel, you get to look at the exact number that you measured and see what is above and below AND by how much without getting out the calculator.

I would like to challenge any drill manufacturer to package the minimum set of Over - Under drills for the fractional sizes. There are more variations too; like tap sizes that are logical and reamer under size too.
The idea is to use existing Metric sizes at the 0.1 and 0.05 size series to create the perfect (minimum) Over - Under drill set that I can reliably go to and instantly/easily grab the a drill that is always the same amount Over or Under

The chart highlights in blue the 0.002" or 0.003" over and under METRIC drills.
What the chart I made also illustrates are great holes or gaps around the fractional sizes that results from using only Number & Letter sizes. Some of the Number series happen to be spot on the Metrics and that is fine but what about the large gaps?


Most drill charts show only the decimal next to the the drill, This makes for a lengthy research project every time you go to make a new decision when choosing a drill. Also it does not show or emphasize the random gaps between them.

Thursday, April 2, 2015

Why I hate my Ryobi 208B 18V Hand Drill

The Ryobi 208B is a good looking, well designed, and what I expected when I got it home last year. The battery system seems very good.

I decided to switch to Ryobi from DeWalt because I feel that DeWalt is getting fat & happy; they have lost their consumer centric design focus.

I have always been happy with Ryobi tools in the past.

Why I hate my 208B is because it cannot hold the bit in the chuck.

Why I hate my 208B is because it cannot hold the bit in the chuck.

I wonder what the Program manager has to say about this?

I'm not sure where the "hold the bit in the chuck" line item is in the design criteria but it might be somewhere at the top.
I suspect that the engineers assumed that any way the chuck works was fine, but it is not.

 So I avoid using it, I am never sure that the bit will remain in the chuck.

HAVING THE BIT FALL OUT DURING THE MIDDLE OF AN OPERATION IS DANGEROUS LET ALONE ANNOYING.


Saturday, March 28, 2015

Spring Loaded Scriber

I have started to rely more on my CNC mill to scribe outlines for 2d parts.
I typically scribe, band-saw, and then end-mill the profile. 

I made one version but was unhappy with the results and so made this version.


Took a 3/8" solid rod.
A 1/8" carbide bit with a 0.040" end.
Spring and 1/4-20 machine screw.


It needed to be 3/8" so that it would fit into the Sherline collet.


Saturday, March 21, 2015

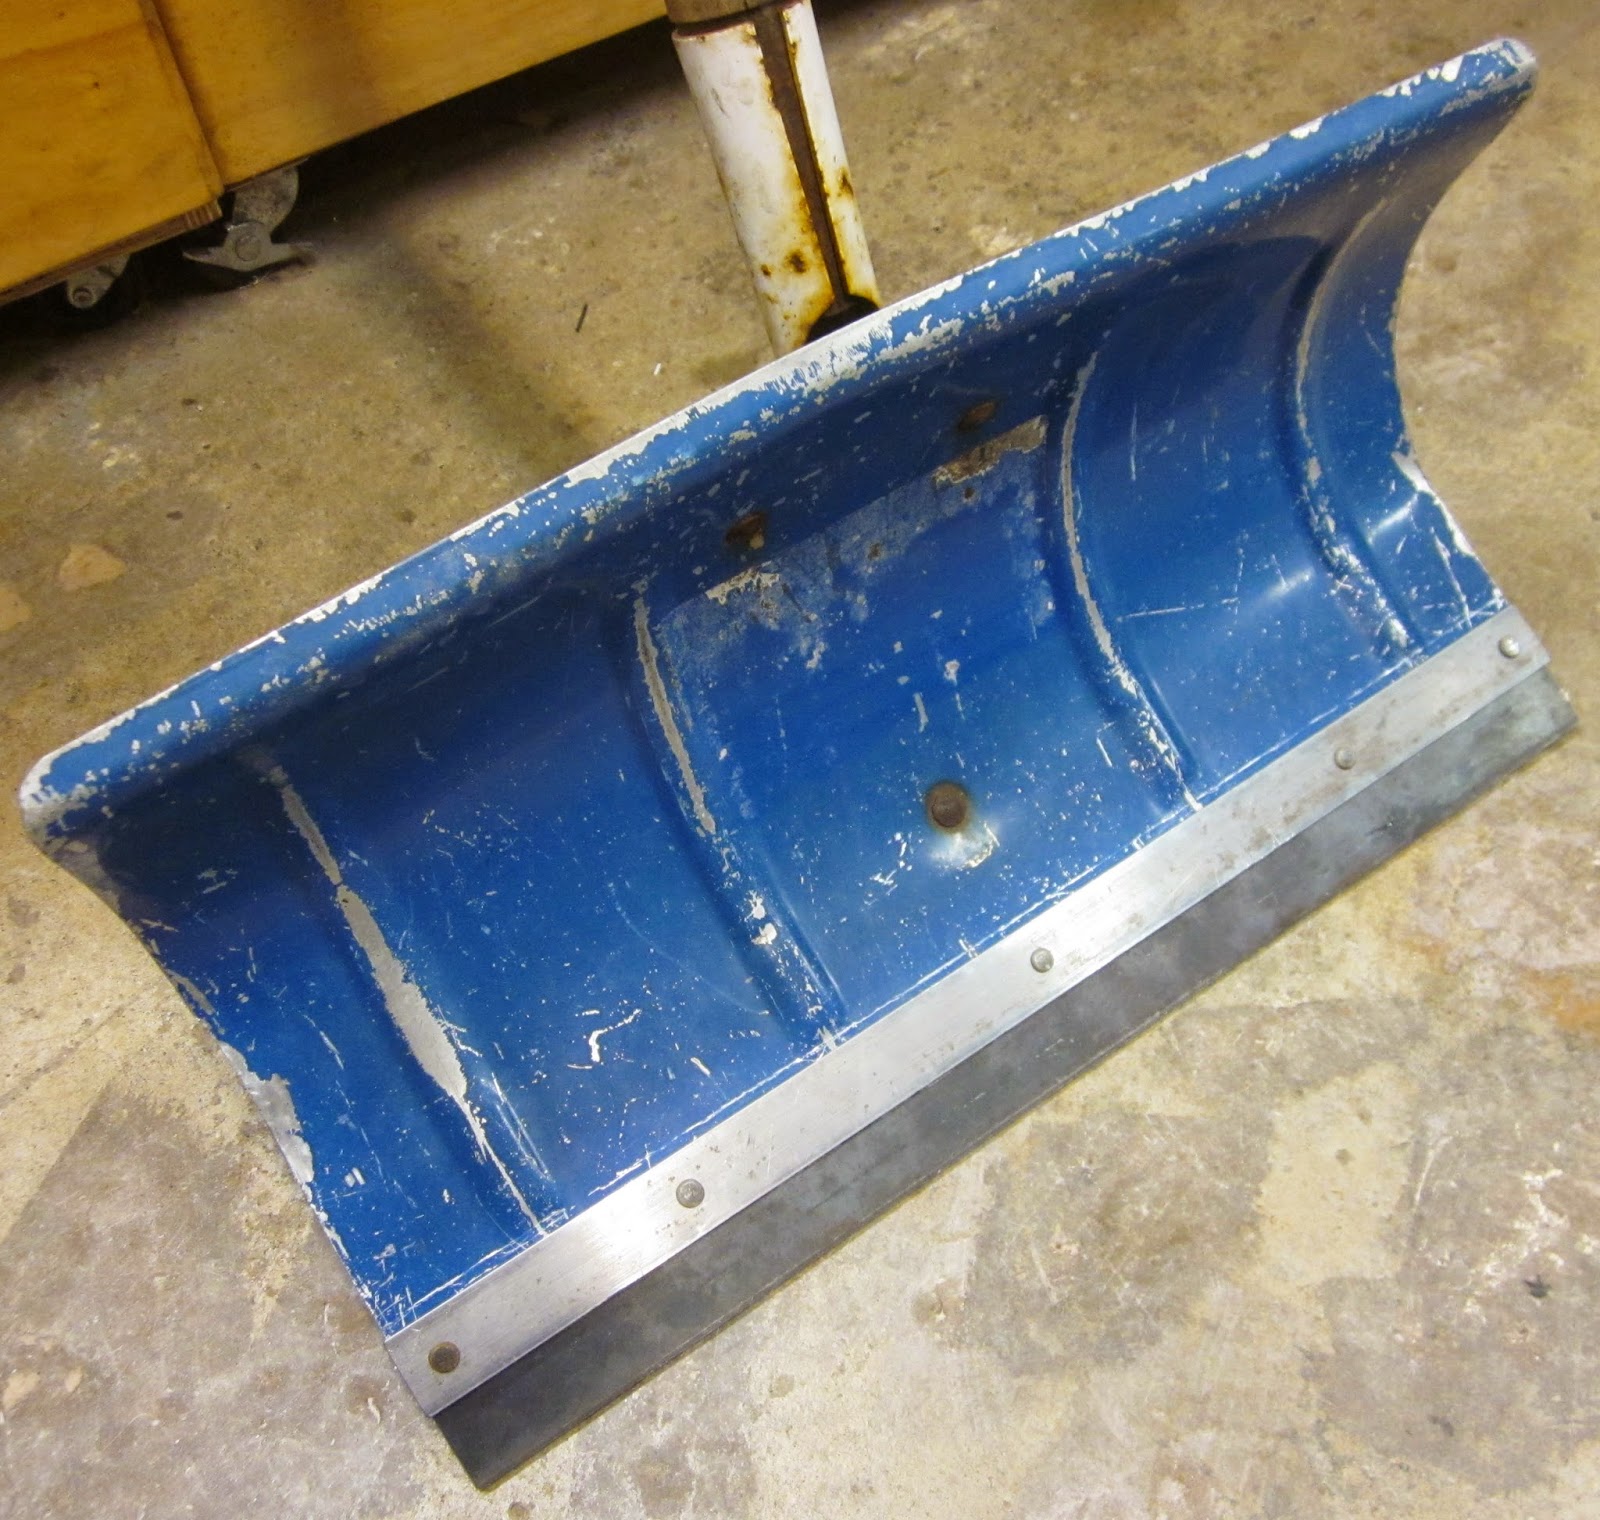
Snow shovel Rebuild #3

I know its not an invention but when you live in Mi. all your life you become attached to your snow shovel!

 It seems like each repair lasts about a decade, after more than 30 years I have the repair method down.

I really like an aluminum snow shovel and don't need to buy one because I can fix almost anything. 


The business end needs to be steel.

A 2" strip on the underside, .75" on the top side, but the trick is Rivets! I use nice big 5/32 rivets, counter bore the underside so that the hammered end of the rivet is as flush as possible.


Sheline CNC Lathe - Center "Punch"/ Drill for Wood Dowel

I've been doing a lot of turning on my CNC lathe and have become increasingly annoyed with the task of center punching purchased wood dowels.
Two things make the job far more difficult than it should be (or would be if it were steel)
1) Off the shelf dowels are not round, they have become elliptical or worse.
2) No matter how accurately you scribe the center your center punch is going to be deflected (dramatically) by the end grain.

NOTE: A right hand center drill is aiming the wrong way down the spindle so you either have to turn the spindle backwards or get a left hand drill. I did the Sherline recommended reverse switch.

The answer is to "machine" the the center "punch"

This is the design prove-out piece
I used  3/8 counter bore fit into a 13/32 piece of brass tube.
13/32 is the ID of the Sherline headstock spindle. It has to spin freely.

This IS a good method!
I don't even support the other end, just visually make it spin true and slowly run the counter bore into the dowel. it only takes a few seconds and is better than even one of those conical center finders.


I liked it so well I decided to make one with bearings and use a center drill.


1/4 x 3/8 x 1/8 RC model bearings. I used my centering tool to create a bearing pack, a 6.5" long 13/32 OD tube, 3/8 ID, the bearings slipped beautifully through.

I put a 1/4" center drill into the end.


12.19.17
I continue to use this thing often.
I use it on steel and aluminum too.
It's ideal because the center drill becomes the tail-stock end and so the accuracy is greatly appreciated.


Wednesday, March 11, 2015

Sherline Mill - Z Axis Reinforcement (Flying Buttress)

For years I have been searching for a retrofit style reinforcement for the flimsy Sherline Z Axis.

Its not flimsy but anyone who has one has probably looked at it and realized that at the upper ends of the travel it couldn't possibly be as stiff as at the bottom. If you run these machines enough you begin to see that the vibrations from machining are resolved mostly in the Z axis.

I run both a hand crank and a CNC version and the real goal here is to develop this idea for the CNC machine.

I have made my 2" increase in Y travel to both of my machines which allows me much greater freedom in mounting work to the table.

I tend to run the 1.25" extension on the spindle mounting all the time. This increases the moment arm between the tool bit and the Z Axis Moment of Inertia.

The box section I fabricated here moves the Moment of Inertia probably the same distance again further from the tool bit BUT increases the overall stiffness.
It would be fantastic to do a comparative FEA on the two versions, I can provide all of CAD data!


I used a 2" x 1.5" x .125" alum. rect. and added 0.125 x 1.5" strips on the sides. The flying buttress is the only way to stiffen the Z Axis because the Z Axis backlash locking lever reaches around and you need good hand access to it.

I had to drill two holes in the Sherline base and two in the steel Z Axis ways.
For the CNC machine I want to make this out of steel but I'm going to try out this one for a while before getting into that.

The more elegant solution would have been 2.25" x 1.5" x 0.125" rect. but that is a rare item indeed.
I'm thinking about a water-jet solid block of alum. too.

04.15.15
Went ahead and made the steel version for the CNC mill.
Should get at least 3 times the stiffness as the alum version.
It looks a little Steampunk but it is extremely stiff!

I added a couple of fasteners to the design to pick up the loose ends.